
You’ve nailed the cabinets. The countertops are done. And then the backsplash decision lands on your lap and somehow, somehow, it feels more paralyzing than every other choice combined.
Sound familiar? When it comes to selecting a ceramic tile backsplash for kitchen walls, the goal isn’t just “looks nice.” It needs to hold its own through daily cooking chaos, make sense alongside everything already in the room, and feel like a deliberate decision, not a last-minute scramble.
Here’s something worth knowing: NARI’s 2025 Remodeling Impact Report gives kitchen upgrades a perfect Joy Score of 10, the highest rating homeowners can give. That tells you every single detail counts. Finish. Scale. Grout. All of it.
This guide walks you through exactly that: ceramic tile backsplash finishes, sizing logic, grout strategy, layout patterns, and an honest maintenance reality check most guides quietly skip.
Ceramic Tile Backsplash Finishes That Actually Work in Real Kitchens
Here’s the thing about finish, it’s not just an aesthetic choice. It shapes how your kitchen feels to be in, how quickly it shows a greasy fingerprint, and whether your phone photos look great or weirdly washed out. Get this part right first, and the rest of your decisions get easier.
The best ceramic tile backsplash for your specific kitchen tiles starts with understanding how each finish behaves under your lighting, not under a showroom’s flattering track lights.
Glossy Finishes for Low-Light Kitchens
Glossy ceramic bounces light. In smaller or darker kitchens, that quality is genuinely useful; it makes the space feel airier and more open than it actually is. When planning a ceramic tile backsplash for kitchen, a wipe-down is also refreshingly simple after a messy sauté session.
The honest trade-off? Under powerful LED lighting, glare becomes real. And any subtle wall imperfection you thought you could ignore becomes very visible once the glossy tile goes up.
Best pairing: glossy white tile with a warm-toned grout, it keeps the reflective benefit without that harsh, clinical edge.
Matte Finishes for Modern and “Quiet” Designs
Matte is the reliable choice for contemporary kitchens and rooms with bold cabinet colors. Fingerprints? Hidden. Minor wall irregularities? Absorbed. It reads calm, which is exactly what most people want in a busy kitchen.
One thing nobody tells you upfront, some ultra-matte glazes hold onto grease near the range. If you cook seriously and often, cleaning frequency becomes more important here than with other finishes.
Satin and Handmade-Look Finishes
Satin lands in the sweet spot: softer than glossy, lower maintenance than certain ultra-matte options. It’s genuinely popular right now in transitional and Scandinavian-inspired kitchens, and you can understand why when you see it in person.
Handmade-look and zellige-style ceramic kitchen tile backsplash finishes bring organic warmth that photographs beautifully and ages even better. One rule to live by: use these on one hero wall, keep the grout simple, and always, always, view a real sample under both daytime and evening light in your actual kitchen before committing.
Once your finish direction is clear, tile size becomes the next lever that determines how the whole backsplash relates to your ceiling height and cabinetry.
Best Ceramic Tile Backsplash Size: Scale Rules That Actually Matter
Scale isn’t just visual; it shapes how your kitchen tiles perform every single day. The size of your tiles directly impacts how many grout lines you’ll be scrubbing each week, how forgiving the installation process is, and whether your wall feels airy or visually heavy.
When planning a ceramic tile backsplash for the kitchen, most showrooms focus on aesthetics alone, but the real difference lies in how scale influences maintenance, durability, and overall balance.
Small-Format and Elongated Subway Options
The 3×6 subway tile has earned its reputation honestly; its proportions fit nearly every kitchen without fighting anything. It works in traditional and transitional spaces, and running it vertically or narrowing the grout joint gives it a fresher, more current energy without abandoning what makes it timeless.
Elongated formats, 3×12, 4×12, 2×16, mean fewer grout lines and a sleeker result overall. They lean architectural. If you’re after the 2026-forward look, the elongated subway is where that direction is being built.
Large-Format and Mosaic Considerations
Larger ceramic panels reduce grout maintenance and create a cleaner visual field. If you’re someone who cooks daily and hates the idea of scrubbing tile, this matters. The practical caveat is that wall flatness and installer experience become genuinely critical as tile dimensions increase.
Mosaics, hex, penny, and picket are better used as accents in a defined zone like a niche or bar area. More grout lines mean more cleaning surface. Use them like seasoning rather than a main ingredient.
A quick cheat sheet worth remembering: busy countertops benefit from larger tile and simpler layouts. Simple counters can handle more patterns and textures. Low ceilings visually lift with elongated or vertically oriented tile.
With size decided, grout color, type, and joint width deserve genuine attention; this is where most homeowners underestimate the impact.
Choosing Kitchen Backsplash Grout: Color, Type, and Joint Width
Choosing kitchen backsplash grout is, honestly, a make-or-break decision. A beautiful tile paired with the wrong grout can look amateurish. A perfectly ordinary tile with the right grout can look considered and custom. This isn’t an exaggeration; research backs it up. Sixty-nine percent of buyers specifically want a customized backsplash, tying it with recessed lighting as one of the top kitchen features people seek.
Grout Color Strategy
Three real approaches exist. Blend, match the grout to the tile for a seamless, continuous look. Frame, go slightly darker to define each tile edge cleanly. Contrast, use a bold difference when your counters and cabinets are simple enough to handle the visual weight. Pick one with intention. Drifting between approaches accidentally is how results end up looking unresolved.
Grout Type Comparison
| Grout Type | Best For | Watch-Out |
| Cement-based | Budget installs, standard tile | Needs sealing; stain-prone near range |
| Pre-mixed/ready-to-use | Small repairs, convenience | Limited durability in high-splash zones |
| Epoxy | Premium performance, heavy-use areas | Higher cost; less forgiving to apply |
Epoxy grout is genuinely worth the price jump in high-splash zones, particularly behind the sink and range. It resists staining, holds its color, and doesn’t fade over time, the way cement-based grout can.
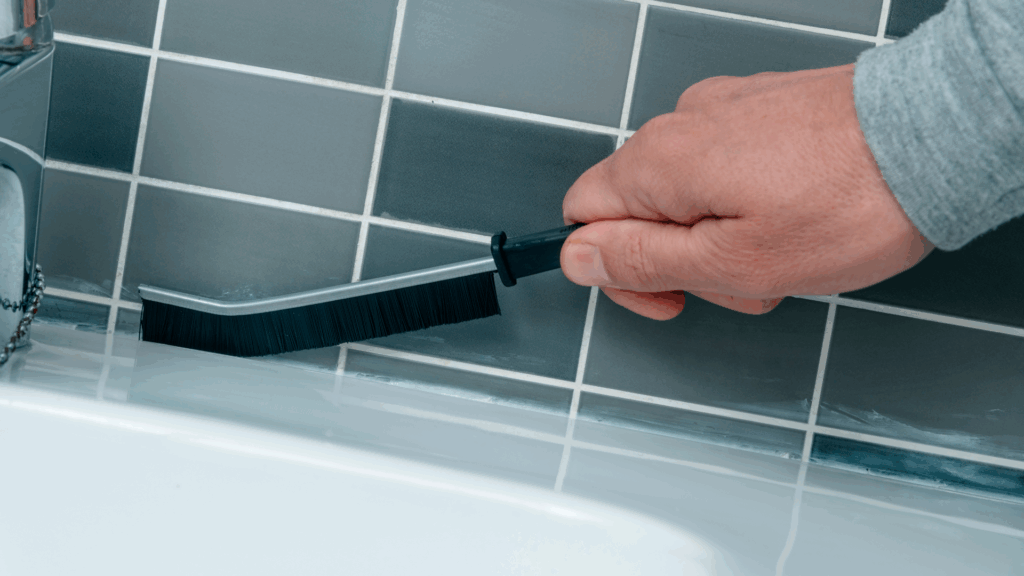
Joint Width and Sealing
Tight grout joints look sharp with factory-edge tile on flat walls. Handmade-look ceramics with naturally irregular edges need slightly wider joints, and this actually reads as more professional, not less. TCNA recommends a minimum 1/8-inch joint for rectified tile and 3/16 inch for calibrated tile, adjusted for edge warping on the longest tile edge.
Cement-based grout near the sink should be sealed on installation day and re-sealed every 12 to 18 months. Anti-microbial additives are a smart, inexpensive upgrade worth specifying behind the sink in particular.
Layout, Color Pairing, and Maintenance: The Details That Separate Good From Great
Good kitchen backsplash tile ideas always settle on the layout before installation starts, not after.
Layout Patterns and Color Pairings
Stacked layouts suit elongated tile and counters with minimal visual movement. Running bond remains reliably timeless for traditional spaces. Herringbone and chevron work brilliantly as a feature behind a range or coffee station, though simplifying the grout color is essential, or the pattern gets swallowed.
For color: warm whites need warm-undertoned grout to avoid a clinical feel. Greige and sand tones with satin or handmade finishes avoid blandness without competing with countertops. Bold tile colors, deep greens, terracotta, matte black, follow a clean rule: let either the tile or the countertop be the hero. Never both, simultaneously.
Maintenance Reality by Finish
Glossy tile near the range needs a quick daily wipe. Matte and textured finishes require a weekly degreaser, especially within 18 inches of the cooktop. Avoid abrasive cleaners on any glazed surface; they dull the finish gradually in ways you won’t notice until the damage is already done.
Your Top Questions About Ceramic Tile Backsplashes, Answered
Is a ceramic tile backsplash for kitchen walls better than porcelain?
For wall applications, ceramic is typically preferred. It’s lighter, easier to cut, and more affordable than porcelain. Porcelain’s density and water-resistance matter more on floors. For backsplashes specifically, ceramic is a practical and widely popular choice.
What are common backsplash tile mistakes?
Skipping a sample test under real kitchen lighting tops the list. Other common regrets include choosing overly trendy patterns, using white grout in high-grease zones, and selecting glass or unsealed cement tile near the range.
What is the best grout width for a backsplash?
TCNA recommends a minimum of 1/8 inch for rectified tile and 3/16 inch for calibrated tile, adjusted for edge warping on the longest tile edge. Handmade-look tiles need the wider end of that range for professional-looking results.
Choosing a Ceramic Tile Backsplash
A well-chosen backsplash doesn’t just protect your walls; it pulls the whole kitchen together in a way that feels considered rather than coincidental. Working through finish first, then size, then grout creates a logical sequence that prevents the most common regrets. Test real samples under real lighting. Invest in quality grout. Plan your layout completely before a single tile goes up.
The kitchen earns the highest joy scores in the home for good reason. And the backsplash? It’s one of the surfaces you’ll look at every single day, morning coffee, weeknight dinners, late-night snacks. Getting it right is genuinely worth the time you’re putting in right now.